1、相关项目
- decap-cms: 原名 netlify-cms ,Netlify 开发的,基于 Git 的静态页面内容管理系统,需要托管在 Netlify。
- astro-decap-cms-oauth:为 astro 添加 decap-cms,并且脱离
Netlify,使用 github oauth 认证。
2、 安装部署
1、安装 astro-decap-cms-oauth
npx astro add astro-decap-cms-oauth2、 配置config.yml
新建public/admin/config.yml,这是 decap-cms 的配置文件
config.yml
# 参考文档:https://decapcms.org/docs/configuration-options/backend:  name: github  branch: main # 改为你的分支  repo: dorukgezici/astro-decap-cms-oauth # 改为你的仓库  site_domain: astro-decap-cms-oauth.vercel.app # 改为你的域名  base_url: https://astro-decap-cms-oauth.vercel.app # 改为你的URL  auth_endpoint: oauth
# 参考文档:https://decapcms.org/docs/collection-folder/collections:  - name: "202308" # 用于路由,例如,/admin/collections/blog    label: "2023年08月"  # UI 中显示名    folder: "src/content/post/2023/08月" # 存储文档的文件夹路径    create: true # 允许用户在此集合中创建新文档    fields:  # 匹配 md 文档开头的 Front Matter ,参考:https://decapcms.org/docs/widgets/      - { label: "标题", name: "title", widget: "string" }      - { label: "简介", name: "description", widget: "string", default: "这是一篇有意思的文章" }      - { label: "发布日期", name: "publishDate", widget: "datetime", date_format: "YYYY-MM-DD" }      - { label: "标签", name: "tags", widget: "list" }      - { label: "ogImage", name: "ogImage", widget: "string", default: "/social-card.avif" }      - { label: "正文", name: "body", widget: "markdown" }
media_folder: "public/assets/images" # 文件将被存储在仓库中的位置public_folder: "/assets/images" # 上传媒体文件的 src 属性logo_url: https://888888.xyz/logo256.avif # 站点logo
3、安装 vercel SSR(服务器端渲染)
pnpm install @astrojs/vercel4、修改 astro.config.ts 文件
添加:
import vercel from "@astrojs/vercel";
export default defineConfig({  output: 'server',  adapter: vercel(),});
5、开启预渲染
由于配置了output: 'server', Astro 项目构建在服务器端运行的应用,而不是生成静态 HTML 文件。
但是我们的页面是静态的,需要设置强制预渲染成html
修改所有src/page下的 Astro 文件,以及src/components/Search.astro
添加:
export const prerender = true;6、修改 pagefind 输出目录
改变了构建模式,导致 build 生成的 pagefind 文件夹,不会包含在 vercel 的 output 中
修改package.json
"postbuild": "pagefind --site dist/client --output-path .vercel/output/static/pagefind",7、在 github 上创建一个 oauth
在 GitHub 上,转到设置 > 开发人员设置 > OAuth 应用 > 新的 OAuth 应用程序。或者使用此直接链接。
- Homepage URL ——
你的域名 - Authorization callback URL ——
域名/oauth/callback
8、添加环境变量
在项目根路径下创建.env
将.env添加到.gitignore
将刚刚创建的 Github OAuth 的 ID 和 SECRET 填入
OAUTH_GITHUB_CLIENT_ID=OAUTH_GITHUB_CLIENT_SECRET=PUBLIC_DECAP_CMS_SRC_URL=https://unpkg.com/decap-cms@^3.3.3/dist/decap-cms.jsPUBLIC_DECAP_CMS_VERSION=3.3.3打开vercel,进入 settings -> Environment Variables -> Import .env
将 .env导入
3、完成!
通过 example.com/admin 登录后台
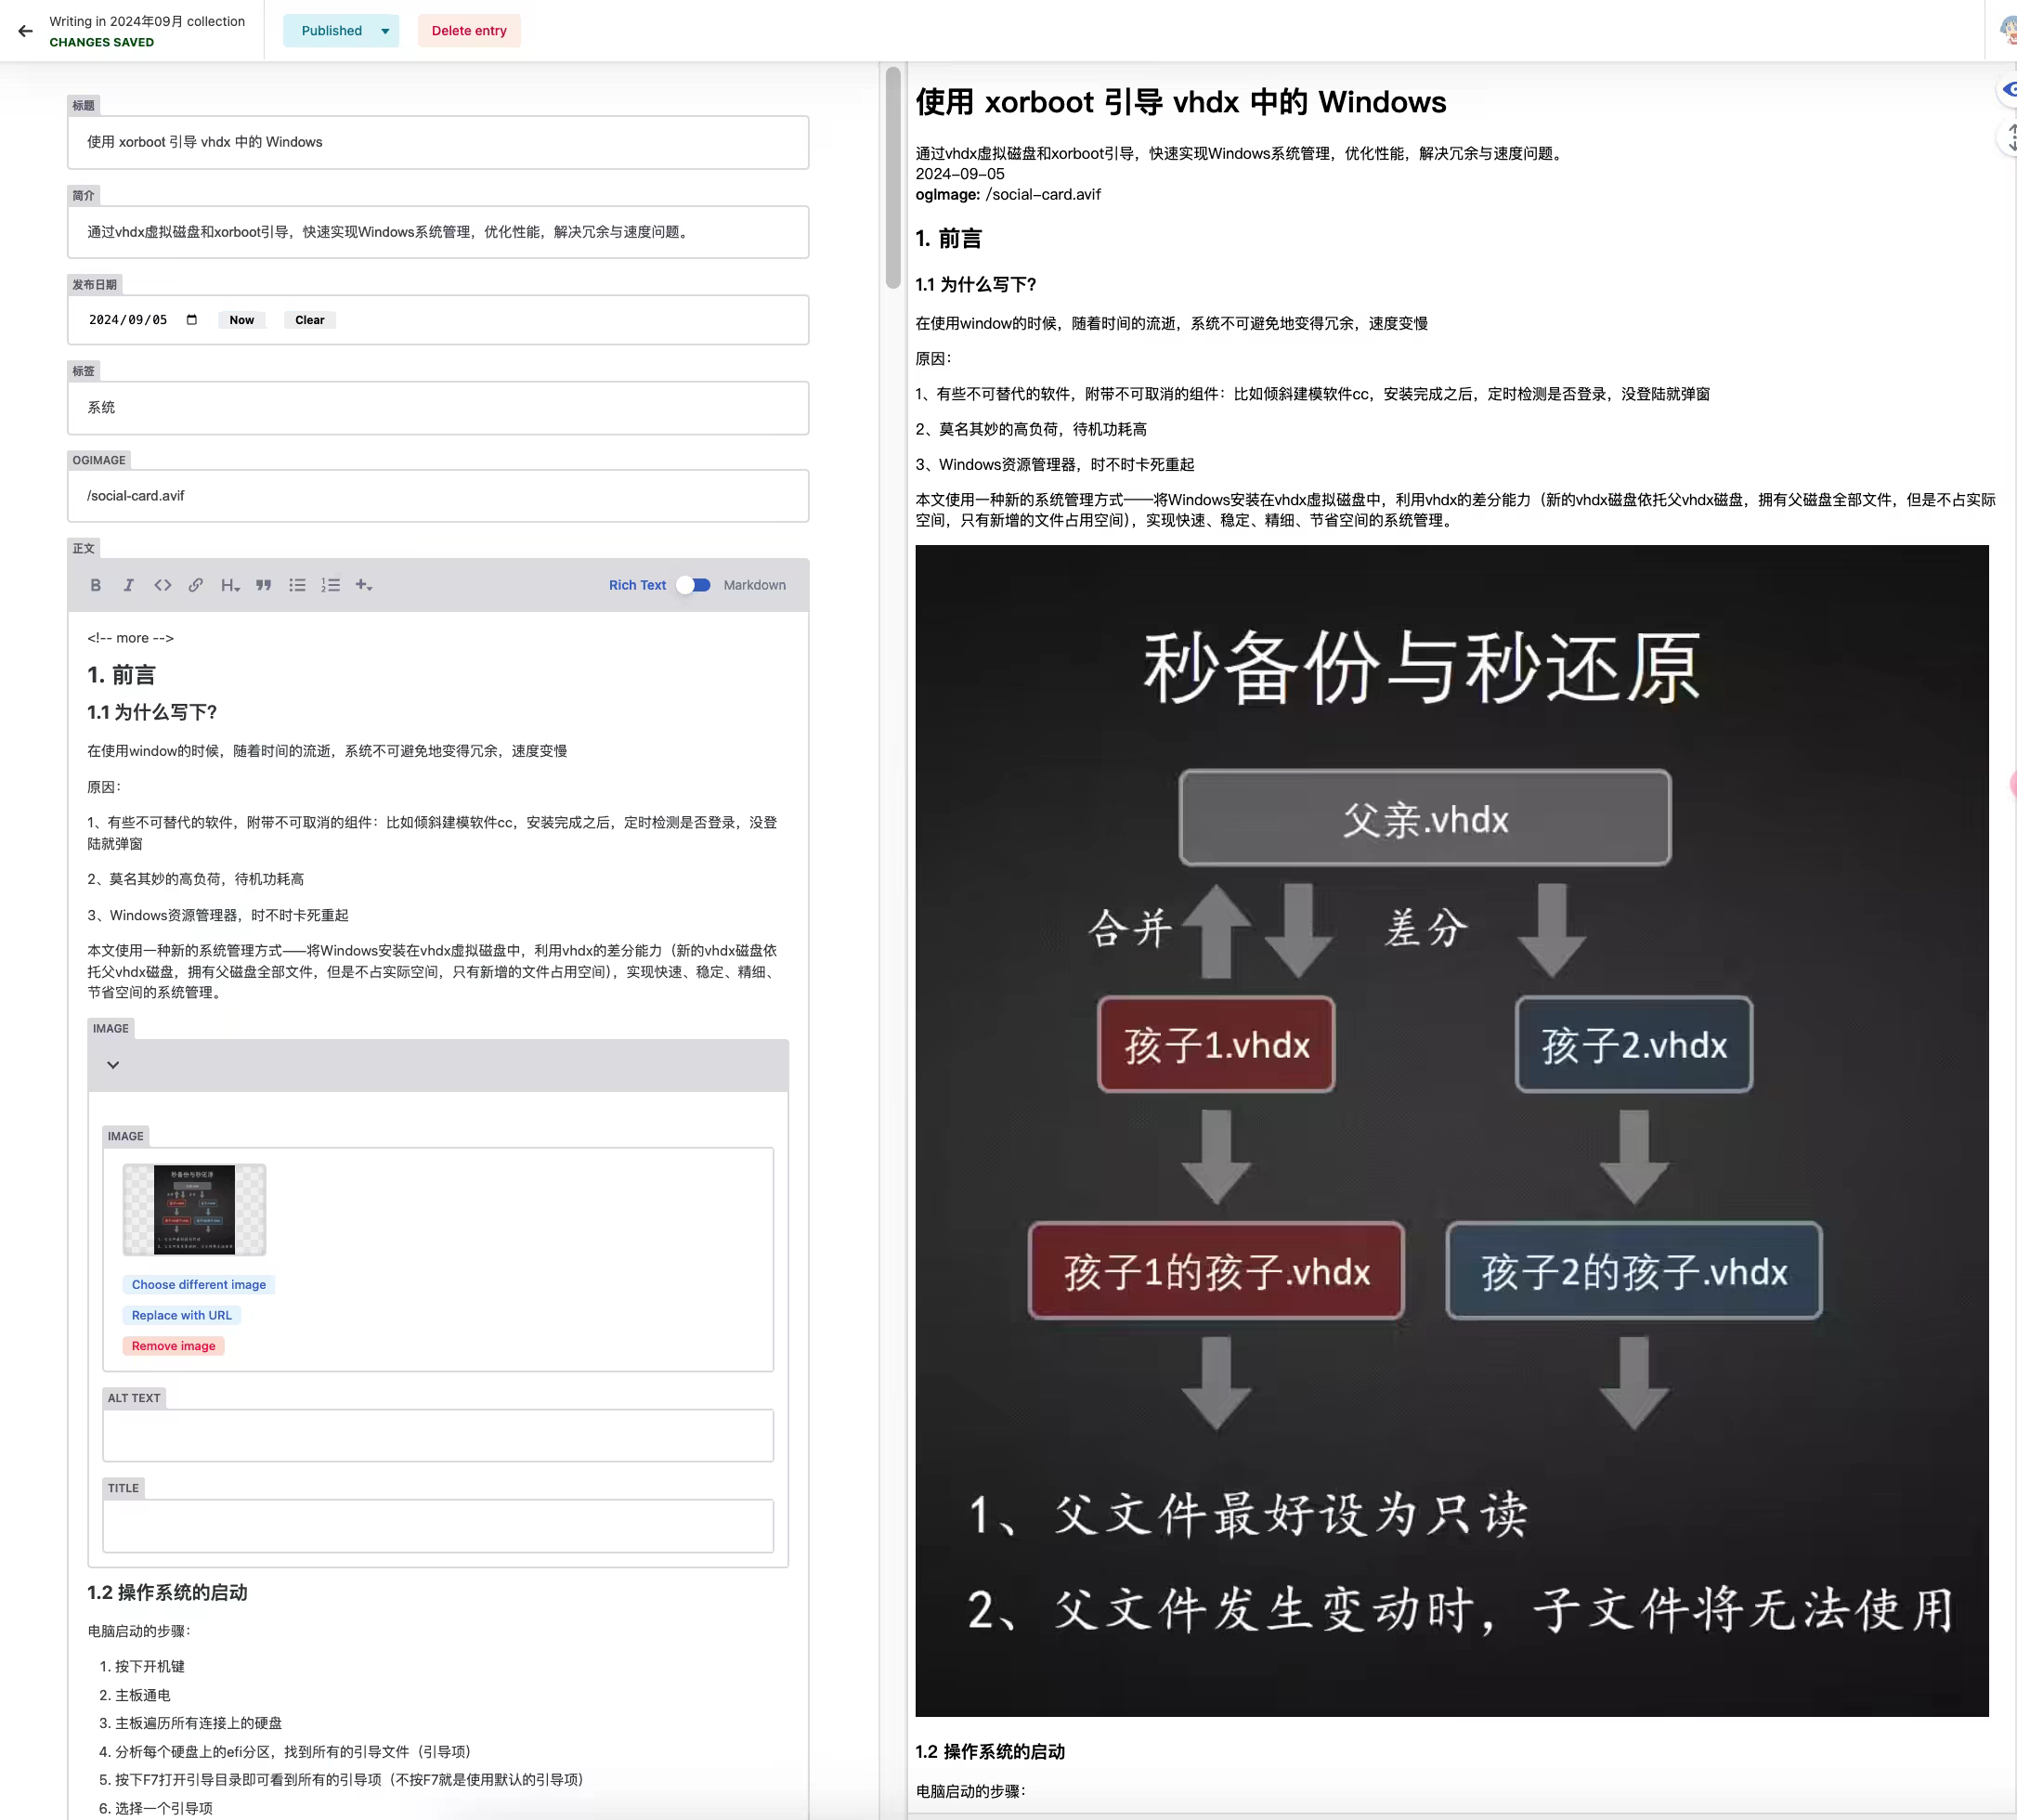
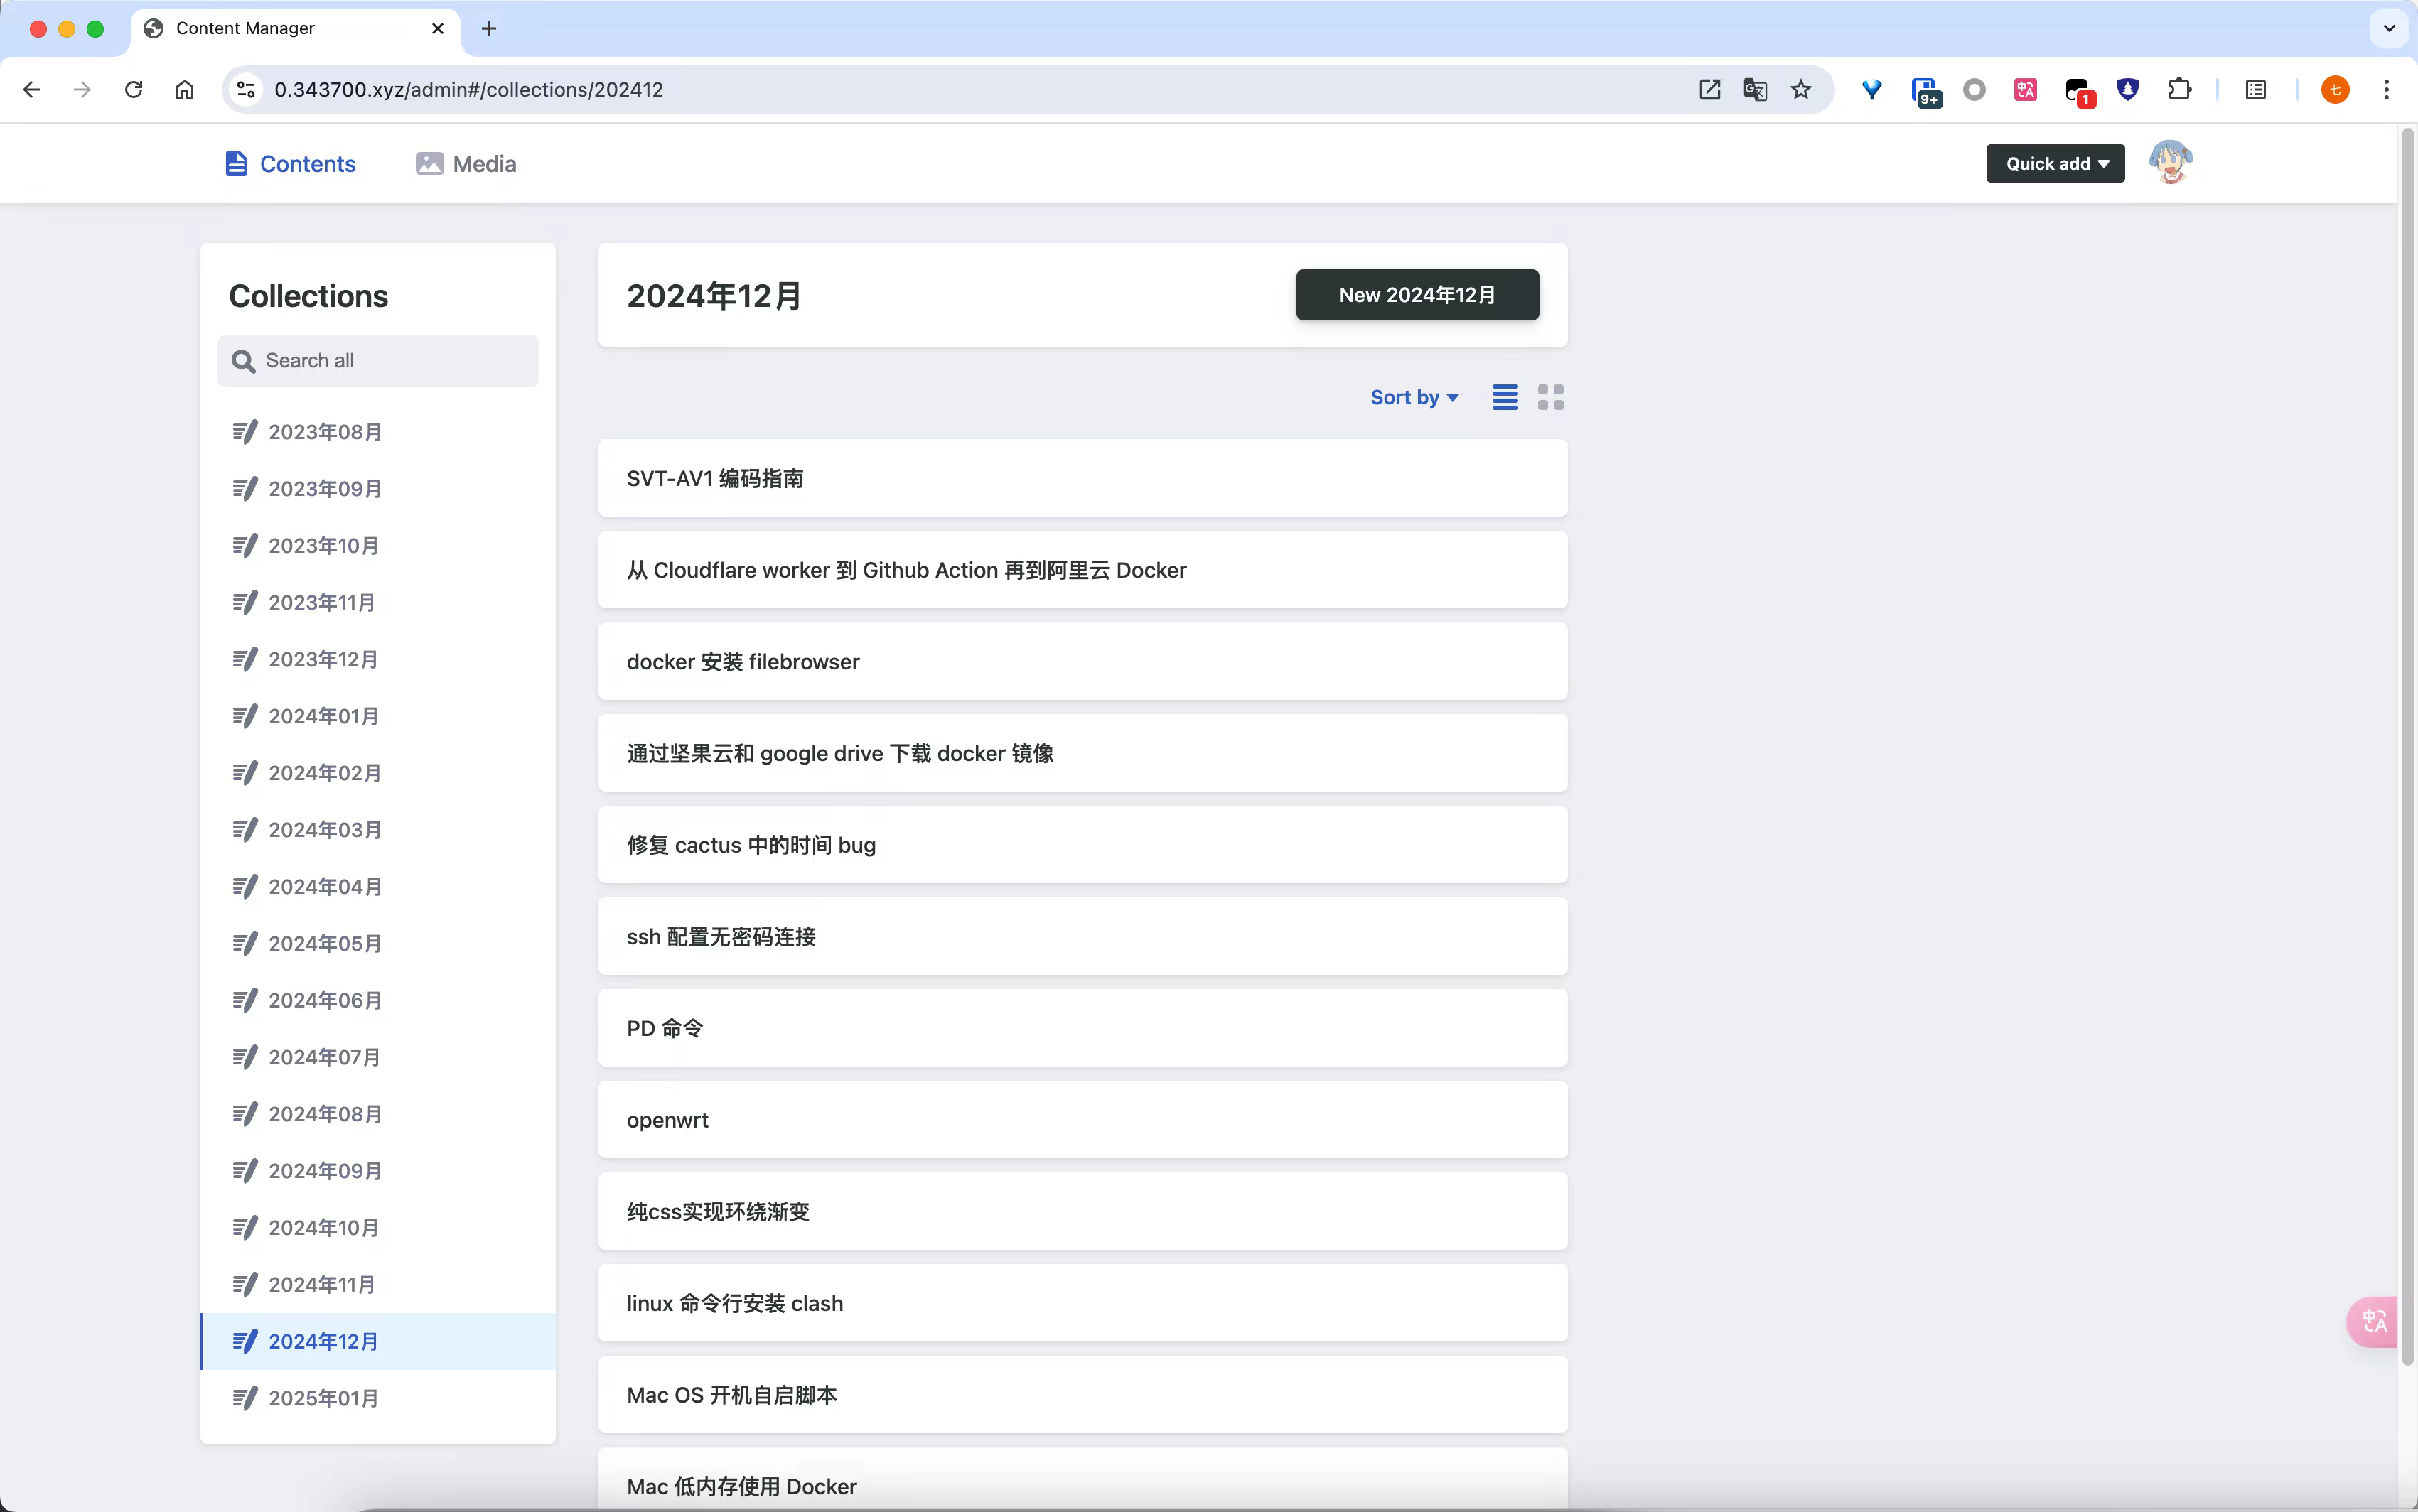
管理页
编辑页