相对于旧版本,新的nezha,不用github登录,改为账号密码登录;
不用先在面板创建客户端,而是所有客户端执行同一条连接命令,面板会自动识别
新的 nezha,目前已经稳定下来了
下面的教程旨在通过 Cloudflare tunnel 来解决
在无法使用docker,只有ipv6的小鸡上部署的问题
1. 安装 nezha Dashboard
curl -L https://raw.githubusercontent.com/nezhahq/scripts/refs/heads/main/install.sh -o nezha.sh && chmod +x nezha.sh && sudo ./nezha.sh记住设置的域名(端口设为443)
TLS 选 y
默认 8008 端口不要改
2. 配置 cloudflare tunnel
https://one.dash.cloudflare.com/
Networks -> Tunnels -> 创建隧道 -> 选择Cloudflared
然后选择对应的系统,复制安装命令到小鸡上执行
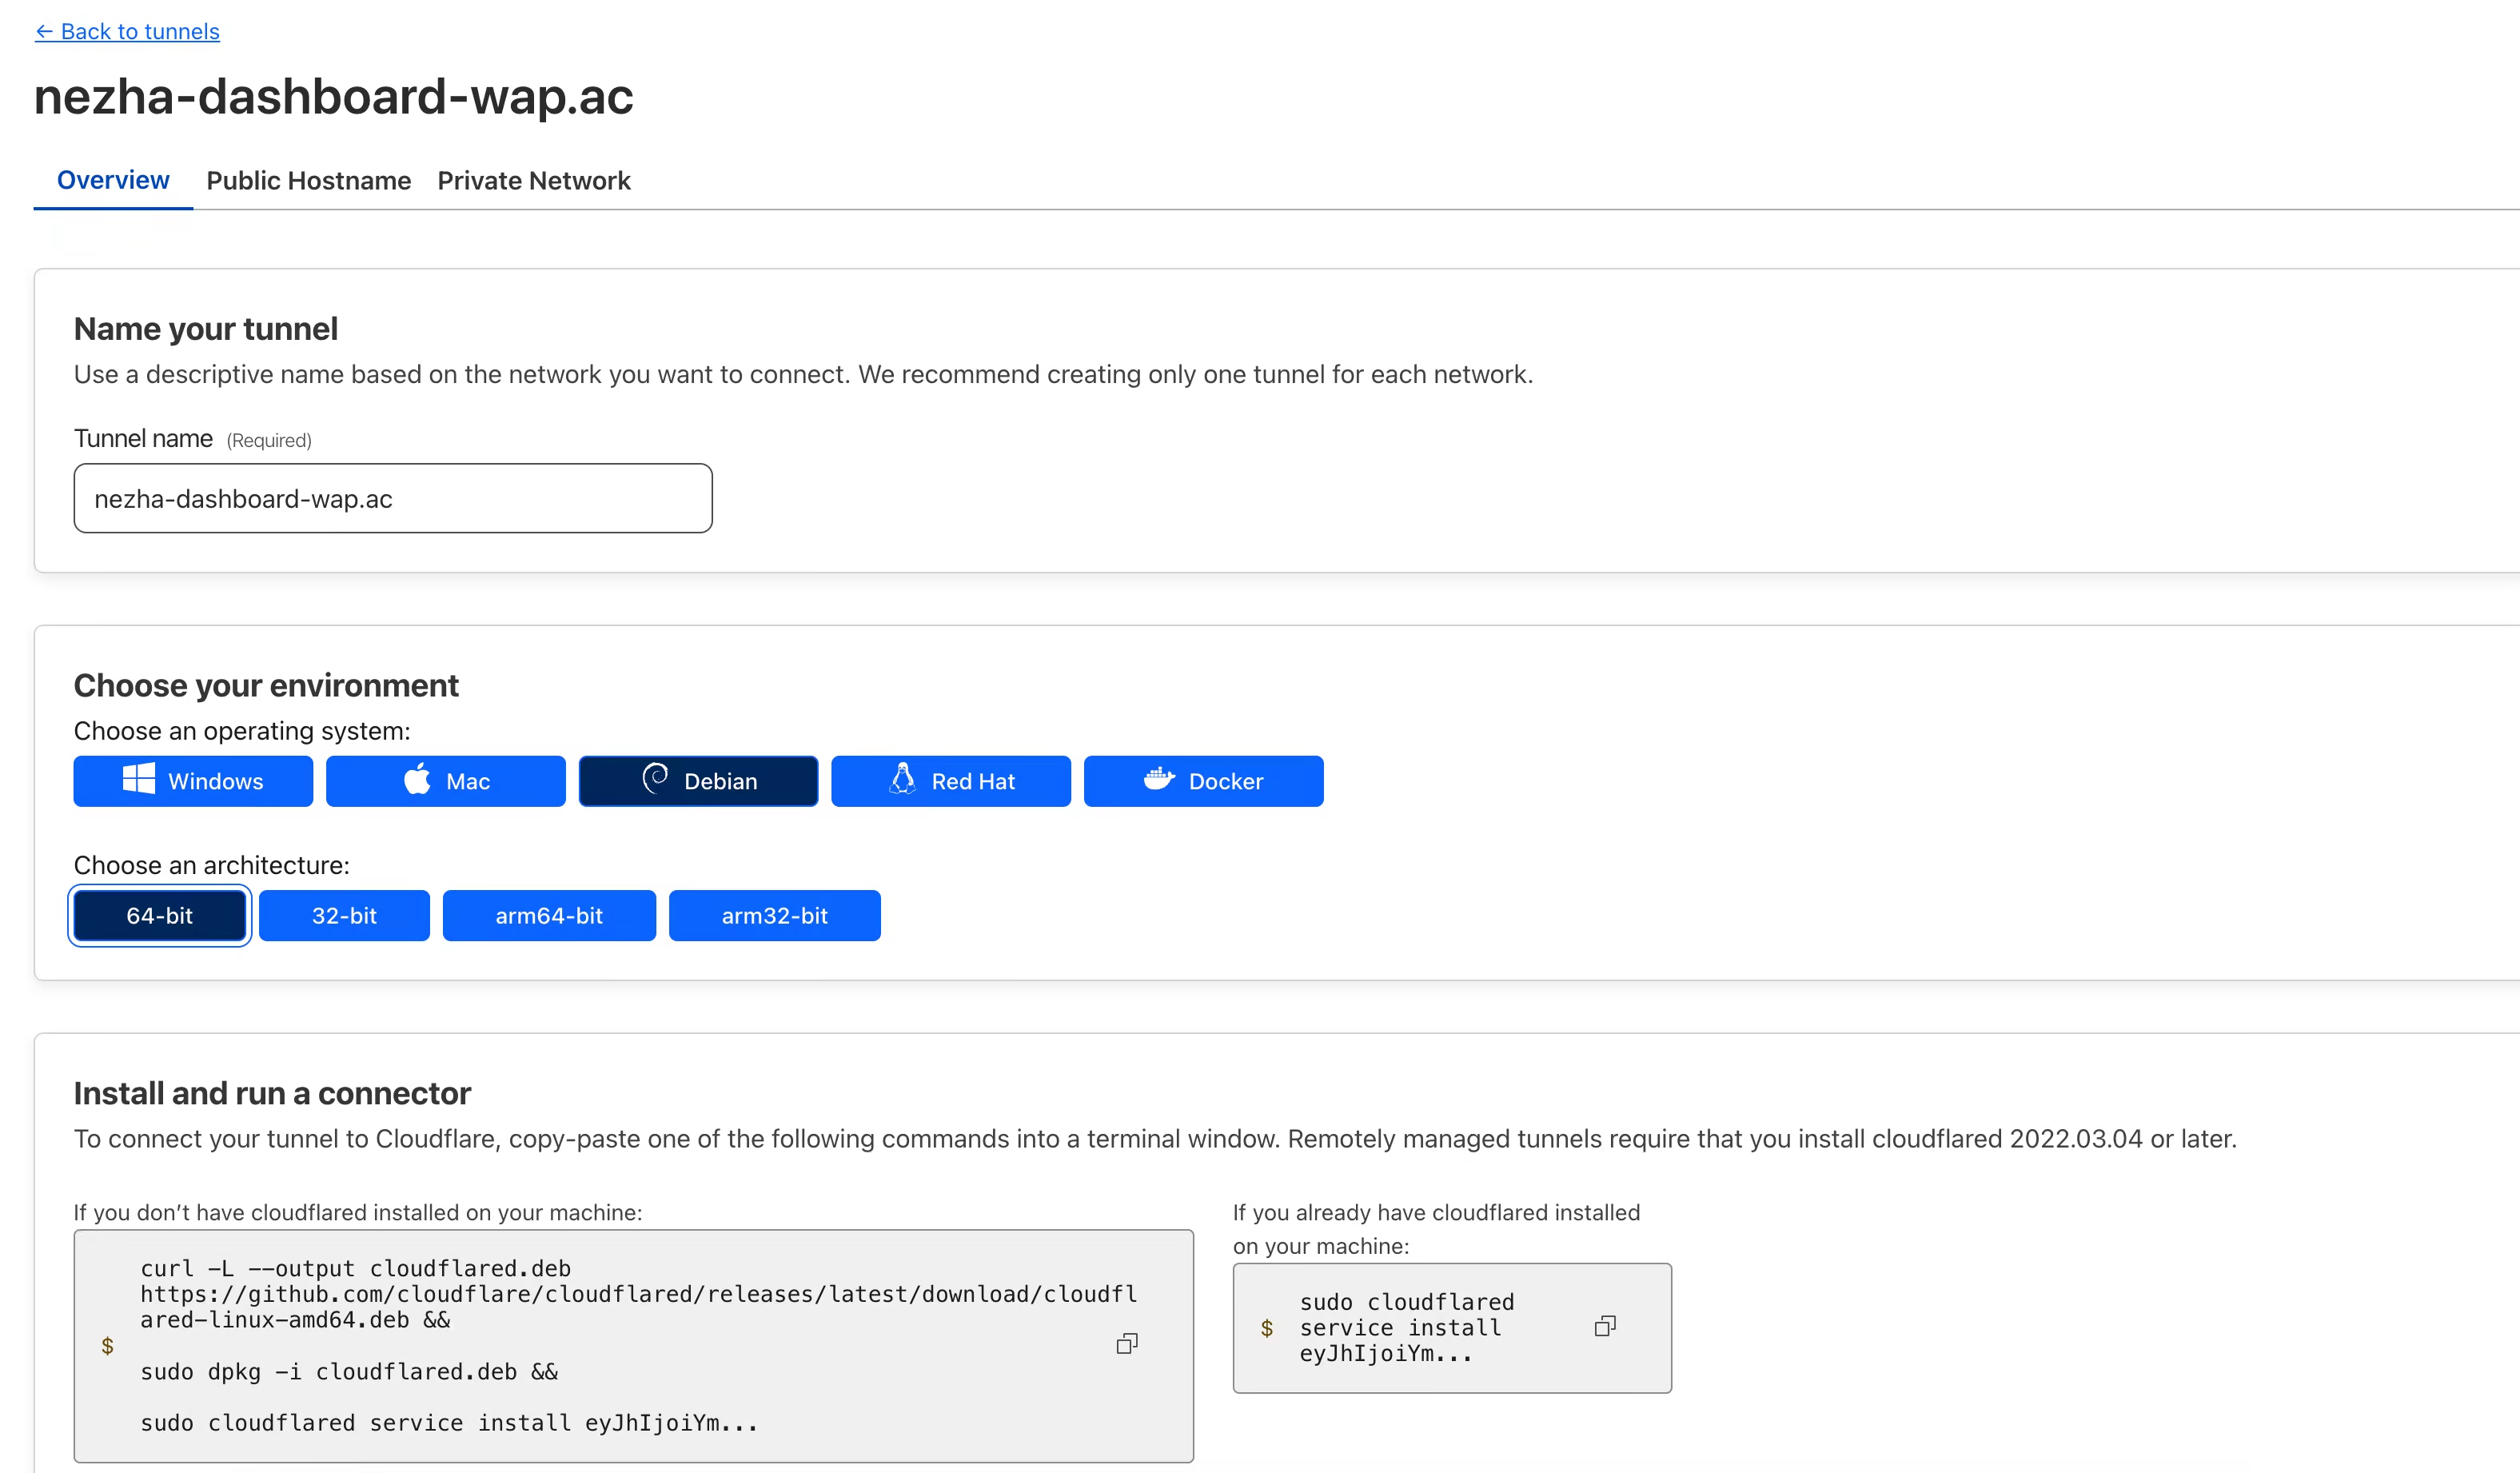
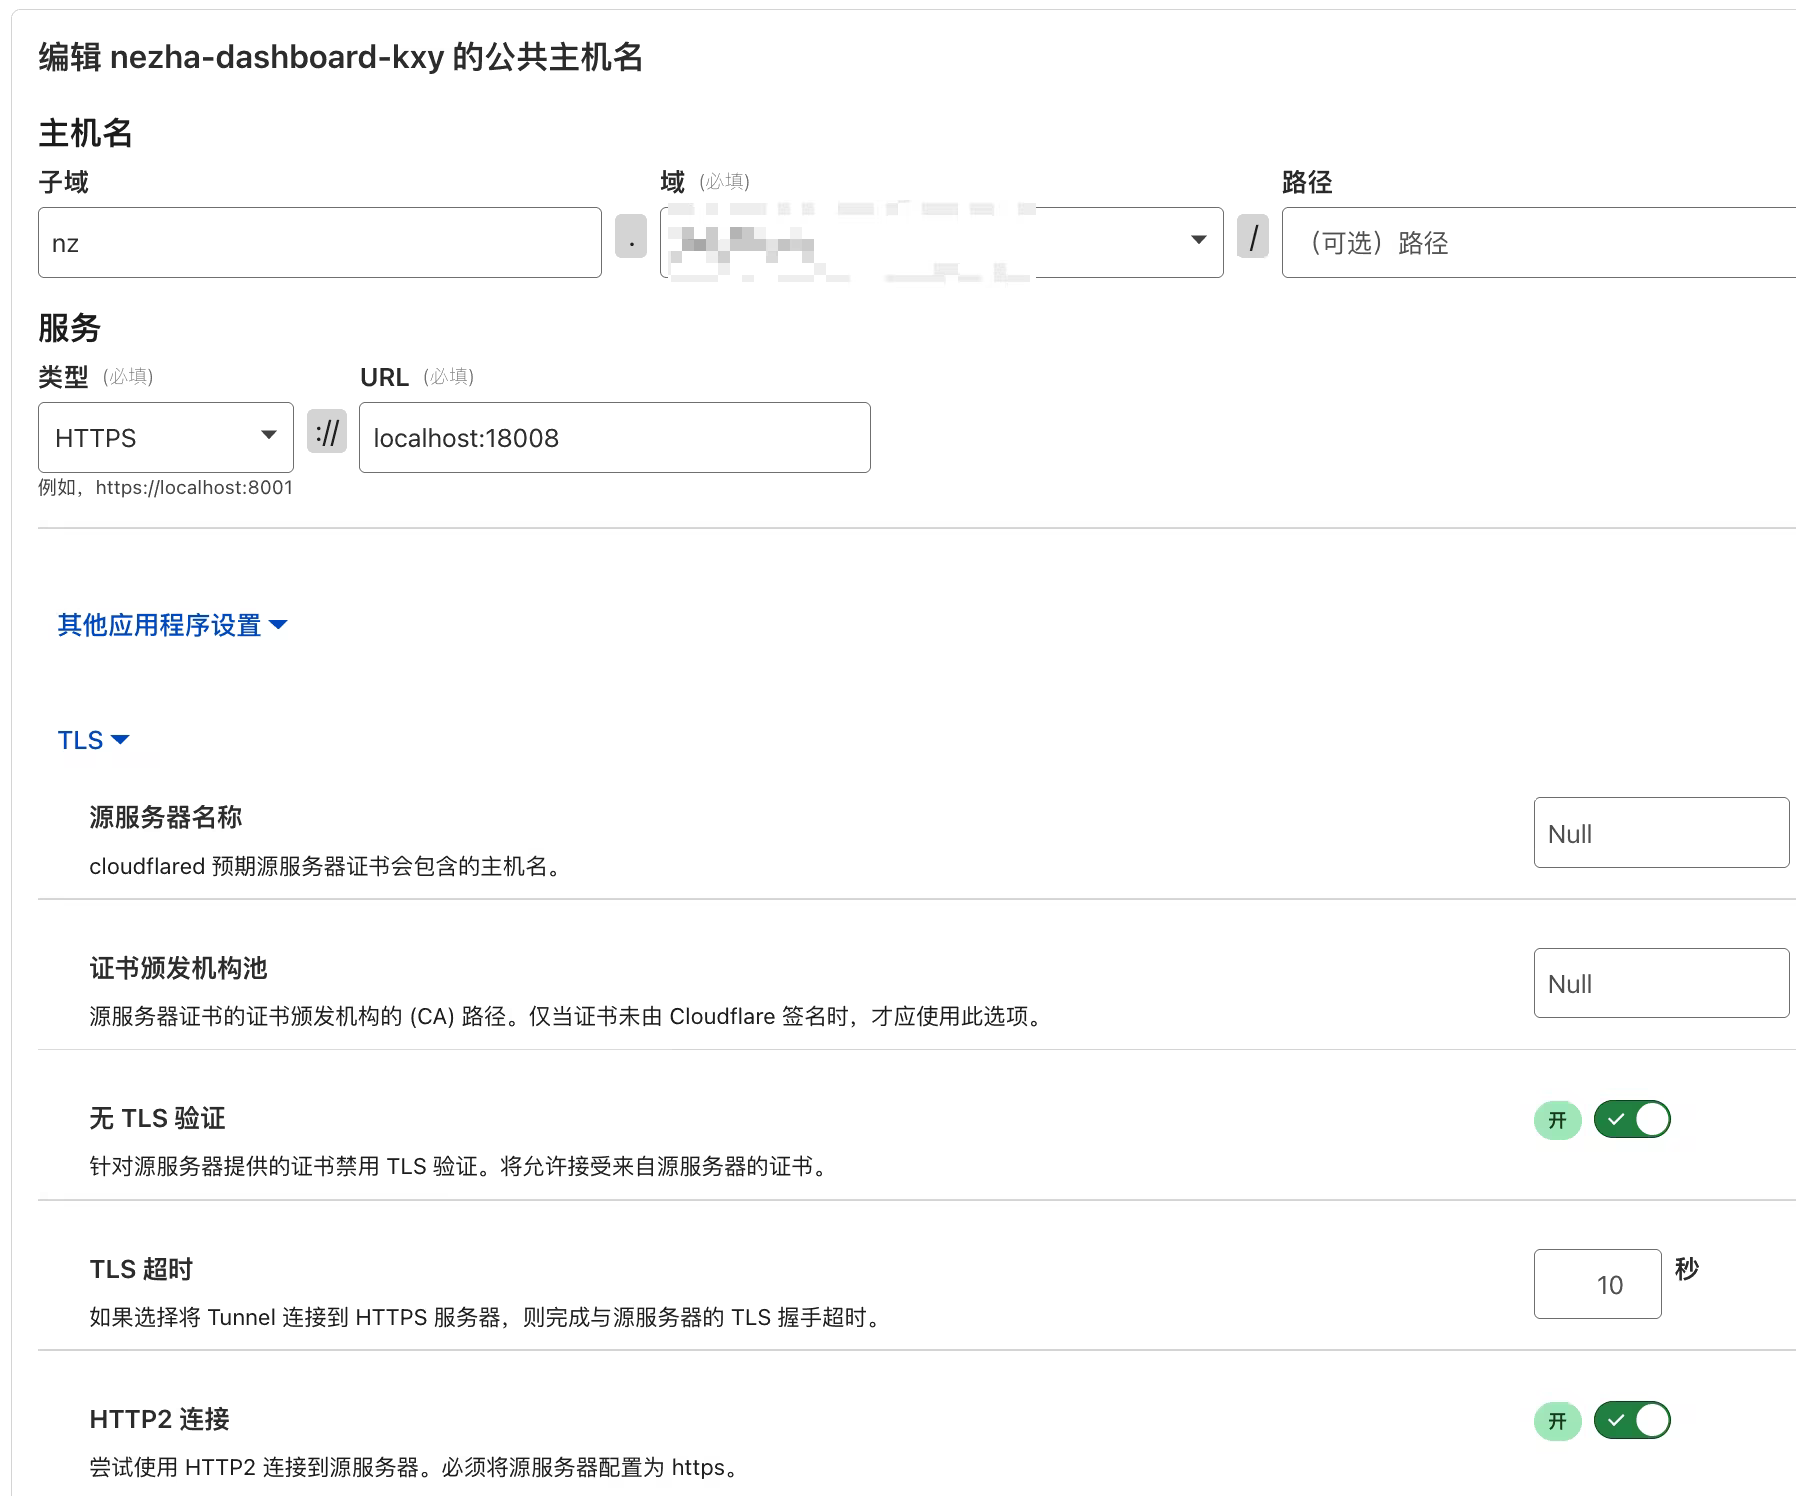
在小鸡上安装完Cloudflare tunnel 之后,回到网页,添加一个 public hostname,(就是第1步的域名)
指向https 127.0.0.1:18008
在 其他应用程序设置——TLS中,将 无 TLS 验证 和 HTTP2 连接 打开
3. tunnel 使用 http2
来到小鸡,修改配置文件
nano /etc/systemd/system/cloudflared.service在ExecStart=/usr/bin/cloudflared --no-autoupdate tunnel run --token 你的token
后面加上 --protocol http2
即 ExecStart=/usr/bin/cloudflared --no-autoupdate tunnel run --token 你的token --protocol http2
保存后
sudo systemctl daemon-reloadsudo systemctl restart cloudflared4. CloudFlare开启GRPC流量代理
选择对应域名 -> 左边菜单“网络” -> 最下面gRPC 开启
5. 生成ssl证书
将下面命令中的bing.com改为你探针的域名(就是第1步的域名)
在小鸡上执行命令
openssl req -x509 -nodes -newkey ec:<(openssl ecparam -name prime256v1) -keyout /etc/hysteria/server.key -out /etc/hysteria/server.crt -subj "/CN=bing.com" -days 365006. 使用nginx进行反向代理
修改nginx配置文件
mv /etc/nginx/nginx.conf /etc/nginx/nginx.conf.baknano /etc/nginx/nginx.conf粘贴下面的配置
user www-data;worker_processes auto;pid /run/nginx.pid;error_log /var/log/nginx/error.log;include /etc/nginx/modules-enabled/*.conf;
events {    worker_connections 768;}
http {    sendfile on;    tcp_nopush on;    types_hash_max_size 2048;    include /etc/nginx/mime.types;    default_type application/octet-stream;
    ssl_protocols TLSv1.2 TLSv1.3;    ssl_prefer_server_ciphers on;    ssl_ciphers 'ECDHE-ECDSA-AES256-GCM-SHA384:ECDHE-RSA-AES256-GCM-SHA384:ECDHE-ECDSA-CHACHA20-POLY1305:ECDHE-RSA-CHACHA20-POLY1305:ECDHE-ECDSA-AES128-GCM-SHA256:ECDHE-RSA-AES128-GCM-SHA256';
    access_log /var/log/nginx/access.log;    gzip on;
    include /etc/nginx/conf.d/*.conf;    include /etc/nginx/sites-enabled/*;
server {    listen 18008 ssl http2;    listen [::]:18008 ssl http2;    # http2 on; # Nginx > 1.25.1,请注释上面两行,启用此行
    server_name nz.343700.xyz; # 替换为你的域名    ssl_certificate          /etc/ssl/server.crt; # 域名证书路径    ssl_certificate_key      /etc/ssl/server.key;       # 域名私钥路径    ssl_stapling on;    ssl_session_timeout 1d;    ssl_session_cache shared:SSL:10m; # 如果与其他配置冲突,请注释此项    ssl_protocols TLSv1.2 TLSv1.3;
    underscores_in_headers on;    set_real_ip_from 0.0.0.0/0; # 替换为你的 CDN 回源 IP 地址段    real_ip_header CF-Connecting-IP; # 替换为你的 CDN 提供的私有 header,此处为 CloudFlare 默认    # 如果你使用nginx作为最外层,把上面两行注释掉
    # grpc 相关    location ^~ /proto.NezhaService/ {        grpc_set_header Host $host;        grpc_set_header nz-realip $http_CF_Connecting_IP; # 替换为你的 CDN 提供的私有 header,此处为 CloudFlare 默认        # grpc_set_header nz-realip $remote_addr; # 如果你使用nginx作为最外层,就把上面一行注释掉,启用此行        grpc_read_timeout 600s;        grpc_send_timeout 600s;        grpc_socket_keepalive on;        client_max_body_size 10m;        grpc_buffer_size 4m;        grpc_pass grpc://dashboard;    }    # websocket 相关    location ~* ^/api/v1/ws/(server|terminal|file)(.*)$ {        proxy_set_header Host $host;        proxy_set_header nz-realip $http_cf_connecting_ip; # 替换为你的 CDN 提供的私有 header,此处为 CloudFlare 默认        # proxy_set_header nz-realip $remote_addr; # 如果你使用nginx作为最外层,就把上面一行注释掉,启用此行        proxy_set_header Origin https://$host;        proxy_set_header Upgrade $http_upgrade;        proxy_set_header Connection "upgrade";        proxy_read_timeout 3600s;        proxy_send_timeout 3600s;        proxy_pass http://127.0.0.1:8008;    }    # web    location / {        proxy_set_header Host $host;        proxy_set_header nz-realip $http_cf_connecting_ip; # 替换为你的 CDN 提供的私有 header,此处为 CloudFlare 默认        # proxy_set_header nz-realip $remote_addr; # 如果你使用nginx作为最外层,就把上面一行注释掉,启用此行        proxy_read_timeout 3600s;        proxy_send_timeout 3600s;        proxy_buffer_size 128k;        proxy_buffers 4 256k;        proxy_busy_buffers_size 256k;        proxy_max_temp_file_size 0;        # proxy_set_header X-Forwarded-Proto $scheme; # 如果你使用nginx作为最外层,就启用此行避免无法正确读取访问的协议        proxy_pass http://127.0.0.1:8008;    }}
upstream dashboard {    server 127.0.0.1:8008;    keepalive 512;}}
重启nginx
sudo systemctl daemon-reloadsudo systemctl restart nginx7. 完成,访问你的域名就可以打开nezha面板辣。
默认账号密码是 admin,admin
账号名改不了,只能切换到新用户删除 admin 用户(注意,会删除已经添加的探针客户端!)